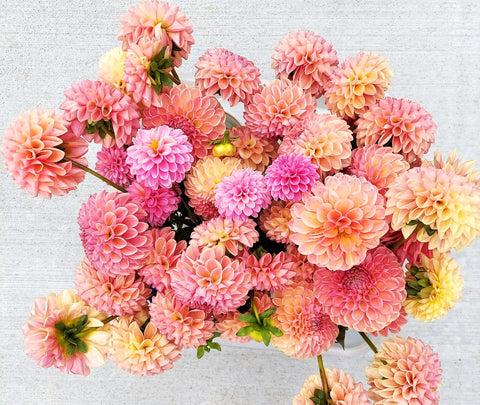
Planting, Growing & Harvesting Dahlias

First off let me just say I'm excited you're interested in dahlias! It's fun to find dahlia friends! I failed my first year growing dahlias and swore I wouldn't waste my time on them the next year. But I had so many tubers come fall, I thought I had nothing to lose in trying again. Sister, I hope this information inspires you to give it a try! I'm here to help you succeed because if I can do it, so can you!!
I have learned that dahlias can be easy to grow and are thrilling when they bloom. Here's what I found to be the best road to success!
First a little information about dahlias.
Dahlias are tubers which are like a potato (people often confuse them with bulbs which is different). You plant one tuber in spring and by fall you have a big clump of tubers from that one you planted (like in the picture below). The cool thing is, you can divide up and multiply the clump, so you have many more to plant next spring!

Dahlias are not cold hardy, meaning they will not overwinter in the ground in cold zones like mine (zone 4). So, if you would like to save them for next year, you do need to dig the tubers out of the ground AFTER the first frost in fall - but we are getting ahead of ourselves here. Let's start with planting a tuber or a dahlia start (meaning someone already split tuber and put it in soil so it is pre- sprouted).
Planting:
1. Choose a location with at least 6 hours of direct sun (the more sun, the better!) and well drained, fertile soil.
2. Plant AFTER the threat of frost has passed which around here is Memorial Day. The soil should be warm (60 degrees) and not soaking wet.
3. Space tubers or their starts 12"-18” apart. For tubers, dig a hole about 4-6" deep and wide enough to accommodate the tuber. Place tuber in the hole with the "eyes" at the top (or lay it on its side) and back-fill the hole gently, covering the tuber completely with a few inches of soil. Do not use mulch on top as it makes it difficult for the sprouts to form and the soil to warm up. I like to put a dusting of bone meal in the hole with the tuber.
4. Stake dahlias to prevent tipping over from wind and heavy blooms. I use 1 t-post at the end of each bed and use twine to make a corral around the tubers, stringing the twine from one t-post to the other.
5. If you are planting many varieties of dahlias, make sure to label them when you put them in the ground. Sharpies tend to fade so I use a plant marker which can be found in hardware stores, garden centers or online.
6. DO NOT WATER THE TUBER after planting, unless the soil is super dry. Wait until you see green shoots coming out before you water. Dahlias are heavy drinkers but they don't like to sit in water, so once the plant is growing, water regularly but watch that they aren't soaked for too long.
Growing:
7. Once the plants have sprouted (or if you start with a sprout), you may begin watering regularly. Fertilize with fish emulsion by spraying on the foliage every week or every other week until the plant starts to bloom.
8. When they reach about 12-16" tall, pinch back leaving the bottom 3-4 sets of leaves. This signals the plant to produce more branches (and more blooms).
9. Plants begin to bloom in August and produce heavily until the first killing frost of the season.
Harvesting:
10. Harvest blooms when they are open and place in water immediately. Cut the stem as long as possible to trigger future long stems. A dahlia is past its prime when the petals are soft, satiny and tired looking on the back of the bloom.

As I mentioned earlier, at the end of the season, after the last frost, you can dig up the tubers and store them over winter in a cool location. I will be sharing more information about digging, storing and splitting tubers in another blog.
I have a tuber sale every March for my email subscribers. Sign up to receive my emails and get info on this exclusive sale!
Let me know if you have any questions.

